Showing posts with label cooking. Show all posts

Sunday, January 19, 2014

Peckish for Pecans

As with last fall and winter, we have pecans coming out of our ears. I still have uncracked nuts from last year, and the yard is full again with this year's crop. I found a nice salmon recipe that uses pecans, so that was our Friday night meal a few weeks ago. I upped the pecans a bit just because I have so many, but I think it would be just as delicious as written. I served it with garlicky green beans, glazed sweet potatoes, and homemade focaccia bread.

 photo 2014-1-21002.jpg

Pecan Crusted Salmon with Honey-Dijon

1/4 cup butter, softened
3 Tbsp whole grain Dijon mustard
1 1/2 Tbsp honey
1/4 cup fresh bread crumbs
1/4 cup finely chopped pecans
4 tsp chopped fresh parsley
4 (4 oz) fillets salmon
salt and pepper to taste
1 lemon, for garnish

Preheat oven to 400 degrees. Line baking sheet with aluminum foil and lightly oil. In a small bowl, stir together butter, mustard, and honey; set aside. In another bowl, mix together bread crumbs, pecans, parsley, and freshly ground pepper and sea salt.

Pat salmon dry and place on prepared baking sheet. Brush each fillet lightly with honey mustard mixture and sprinkle with bread crumb mixture; press to adhere. Bake salmon 12 to 15 minutes in preheated oven, or until it flakes easily with a fork. Garnish with a wedge of lemon.

Friday, May 17, 2013

Grilling Greats

We're probably way behind the curve, but we finally had our first grilled meal of the spring. I marinated some top sirloin while we played a game of tennis and then threw together a salad with our garden mesclun greens while the steak grilled. Topped off with a blue cheese vinaigrette, served with homemade lemon thyme green tea, and served on the patio table in the back lawn, it was a wonderful end to a lovely Thursday!

 photo 2013-5-15038.jpg

Thursday, February 28, 2013

Delicious Nutella

We had another get-together and dinner for Jeff's grad students, so this time I made chili and cornbread and, for dessert, a chocolate hazelnut cheesecake. It needed to be gluten-free, so I used our pecans to make a nut based crust. Jeff and I had a fun discussion about cheesecake properties and cracking (since he is a fracture guy). I almost hoped the cheesecake would crack, just so he could analyze it, but it turned out lovely and smooth (I suppose I could have skipped the water bath if I really wanted to encourage it to split).

I didn't think to get a photo until I was cutting into it, so Jeff snapped an image with his iPhone.
 photo b8ab65aa-8578-4ffa-a513-0043bb0fa6a3.jpg

A slice with cherry glaze on top. Yum!
 photo db189cb8-4641-43fd-9cdc-a9c3f9092c6e.jpg

Thursday, February 7, 2013

Pretty Pecans

It's been really busy around here lately, but we have discovered one time-saver. Cracked pecans! I was told last year by the local farmer's coop that our pecans were too small for their cracking machine. They tried to run a few through and it just didn't work. So we gave up and cracked by hand. It is very labor intensive, messy, and a bit painful, so we had bags and bags of pecans that went to waste in the shop over the summer.

This fall, we've had another bountiful crop. I didn't want to pick up all those pecans if they were just going to go bad again, so I spent some time calling around. I found another feed store that has several machines that can handle a range of pecan sizes. So with a hopeful heart, I took in a few buckets to see what they could do. It worked! Eureka! Now I just need to collect recipes to use all these tasty pecans. If you have a dish that uses lots of nuts, please send it along. My deep freezer can only hold so many bags, and I've got to get cracking and consume some of these.

Photobucket
We've been picking up buckets full like this everyday!

Thursday, November 29, 2012

Thankful

One of the many reasons I love Thanksgiving so much is because it's the only time of year you can buy fresh cranberries in the store. Even as a picky eater in childhood, I have always loved cranberry sauce. The whole berry canned variety will do in a pinch, but my mom spoiled us with homemade and it is that which I truly prefer. A homemade batch is my yearly contribution to the Evans' family Thanksgiving table. I always make a double or triple batch so we can enjoy it before, during, and after the holiday!

It's basically the staple recipe on the bag of cranberries, with lots of my own variation. I substitute orange juice for half of the liquid, and I simmer cinnamon sticks, allspice, and cloves to infuse the water for the other half. I often stir in a tablespoon or so of brandy just after boiling the berries, too.

2012-11-16041
One of Jeff's favorite meals: tender turkeyloaf with pineapple glaze, candied sweet potatoes, spiced cranberry sauce, and a green veggie for good measure & pretty color!

Monday, August 27, 2012

Bring on the Roasted Potatoes!

Jeff and I can't stop singing "bring on the roasted potatoes!". It's all because of a little NPR story we heard last week about PBS auto-tuning some of the old favorite program hosts. Now, I didn't even know what auto-tune was, let alone how it applied to people like Bob Ross and Mr. Rogers, but I do love Julia Child. So we surfed on over to YouTube to hear the full version. How great is this!


Thursday, August 23, 2012

Plum Shriveled Up!

Here's a sampling of our first batch of "sun-dried" tomatoes for the year. We've been enjoying the fresh, ripe cherry and plum tomatoes in salads, soups, pastas, etc., but when they start coming out of our ears, I turn to dehydrating.

IMG_1435-1

I don't know if it's just the variety I planted, or the early lack of rain, or some other microclimate factor, but my Roma tomatoes are quite small this year. But that just makes drying them go all the more quickly. My technique is to slice lengthwise, arrange on a cooling rack, sprinkle with salt and pepper, and place in the oven at 200 F. It usually takes at least six hours, but with the small ones, I got it done in just over four.

Another little summer treat is homemade peach milkshakes. I still can't get them to taste quite as good as Chik-fil-a, but I comfort myself that they probably use some less healthy recipe or ingredients!

photo-54-12

Thursday, June 21, 2012

Eat your heart out

We had company over for dinner tonight, so I tried a new bread recipe to accompany the spinach stuffed chicken and crepe manicotti I served. It is a fairly standard loaf, but features the inclusion of pine nuts, asiago cheese, and fresh basil from the garden.

Come to think of it, those ingredients sound like the makings of pesto. Which begs the question, why didn't I just put in a few dollops of store-bought pesto to my basic dough and be done with it? Now that I've tasted it, it was good bread, but I'm not sure it lived up to the effort of toasting, grating, and chopping! I'll have to try the leftovers as toast in the morning and see if my opinion has improved.

The chicken was a big hit, however. It looked quite attractive and the servings went a long way. I pounded out the marinated breasts into thin paillards, rolled it around my spinach and mushroom stuffing with various cheeses and seasoning, seared the outside for a nice crust and color, and finished it off in the oven while the bread and manicotti rested. I sliced the meat into spirals (a messy process, but pretty in the end), deglazed the pan, and poured a thin trickle over the plated meat.

I was too busy to get a photo of the finished product, but Jeff snapped this picture just before the chicken went in the oven. It's a very filling course, so each breast serves about two.

Photobucket

Wednesday, January 4, 2012

Sugared Pecans

I know it's been awhile, but I got busy and forgot to post this photo and recipe. Here are my sugared pecans.

Photobucket

1 egg white, lightly beaten
2 tsp water
1 tsp vanilla
1 lb pecan halves (about 4 cups)
3/4 cup white sugar
1/2 tsp salt
3/4 tsp cinnamon
3/4 tsp nutmeg
pinch of cayenne

Preheat oven to 250 degrees F. Line a baking sheet with parchment paper or foil.
In a small bowl beat the egg white with water and vanilla. Stir in the pecans, mixing until well moistened. In a small bowl, mix together sugar, salt, and spices. Sprinkle over the moistened nuts and stir until evenly coated. Spread nuts on prepared pan. Bake for 1 hour, stirring every 15 minutes.

Wednesday, December 28, 2011

Daily Dinners

I would have to admit that I have been heating foods more than cooking lately. With most of my pantry and cupboard stores located in the empty upstairs bedrooms, and given the very limited counter space of the laundry room, we have done a large share of soups, sandwiches, salads, and the like. I found a great line of prepared Indian foods, which come with basmati rice and pouches of various curries. These are amazingly healthy with no preservatives and lots of vegetables, spices, and pulse. Apple slices and raw veggies with dip have also been a regular portion at most every meal.

But I did manage to cook a fairly decent dinner yesterday. It necessitated running upstairs two or three times and out to the shop once, but I gathered all the ingredients and prepared the chicken, stuffing, gravy, and glazed sweet potatoes without major incident (unless you count discovering mice in my upstairs food storage area as "incident", which I prefer to call "Jeffrey emergency").

Photobucket

Monday, December 26, 2011

Herbal Bath

No, it wasn't a relaxing chamomile soak, or even a lavender scented wash. It was parsley!

When I went to get into the tub yesterday evening for a warm and cleansing rinse after a hard day, I found, much to my amusement, a piece of parsley floating in the bath water. It was a remnant from dinner, when I washed my electric cooker in the tub (it won't fit in the pedestal sink)!

This has been my evening ritual for the past few days, bent over the tub scrubbing our cookery and utensils. It's amazing how quickly you get use to it, though. I almost can't imagine the luxury of a working range, close-by refrigerator, and running water. And all in the same room; sheer decadence!
Photobucket

Wednesday, September 14, 2011

Some Egg-cellent Meals

With the abundance of eggs produced from our feathered friends, I have been finding some creative ways to use our bounty. I did eggs benedict (without the ham, but I did serve turkey sausage on the side):

Photobucket
The sauce sort of disappeared, but it tasted great!

I added hardboiled eggs to our salads:
Photobucket

And I made a chili cheese puff for dinner last night:
Photobucket
A tasty recipe courtesy of Kelly Havens from the Indianapolis area

I have some quiches and frittatas next on the menu!

Wednesday, July 13, 2011

Cobbled Together


I had to find a purpose for some blackberries I was cleaning out of our refrigerator in preparation for the move. Cobbler it is! I had already packed my pie pans, so this was created in the tin of the "to go" leftovers from our anniversary dinner. That was Jeff's brilliant idea (never one to let lack of equipment stand in the way of dessert)!

Sarah's Blackberry Cobbler

2 1/2 cups fresh blackberries
1 cup raw sugar
sprinkle of cinnamon
zest and juice of 1/4 lemon
1 cup flour (I like to use half whole wheat pastry and half all-purpose)
2 teaspoons baking powder
1/2 teaspoon salt
1 cup milk
1 tsp vanilla
1/2 cup butter, melted

Heat oven to 375°F. In medium bowl, stir together blackberries, sugar, cinnamon, and lemon zest and juice. Let stand about 20 minutes or until fruit syrup forms. Meanwhile, in large bowl, stir together flour, baking powder, salt, milk, and vanilla (some lumps will remain; don't beat too hard). Stir in melted butter until blended. Spread in ungreased 8" square pan or 9" pie pan. Spoon blackberry mixture evenly over batter. Bake 45-50 minutes or until dough rises and is golden. Serve warm with cream or ice cream.

Monday, June 13, 2011

A bun in the oven...

No, not that kind (we're apparently very poor chefs in that arena). The tasty, crackly, crusty, chewy, delicious carbohydrate variety.

Photobucket
The just baked boule in the Dutch oven

I haven't baked artisan loaves in a little while because 1) I was out of my favorite go-to, never-fail, must-have yeast, and 2) it's been so hot and humid I didn't want to leave my oven on 500°F for over an hour.

But Friday felt like a baking day. Actually, Thursday felt like a baking day and Friday like an eating day, because I have to start almost 48 hours before. But the end result was a lovely golden boule with a crisp crackle to the crust as it cooled. And a tantalizing taste on the tongue when tested (forgive the excessive alliteration, but I think you get the picture ;-).

Photobucket
Cooling its heels
(oh, haha, that's pretty funny; the crusty ends of the loaf are called heels,
so it's an almost literal phrase in this case; what a good pun!)

Monday, May 30, 2011

Cake Catastrophe

Photobucket

Well, the worst-case scenario of my baking world finally happened. After preparing a multi-layered stacked graduation cake with various types of filling, frosting, and edible decorations and topper, we had to transport the delicacy almost two hours over rough Southern roads, hills, and four (count them, four) train tracks! Jeff is a careful and conscientious driver, and never more so with fragile cargo. But the last set the tracks, just three minutes from our destination, did the cake in. Even after braking gently down to almost a crawl, the diagonal rails where just too much waggle and sway, with a bounce to boot. We heard a thud from the back and immediately knew our fears were realized; cake down, cake down!

I couldn't look when we arrived, but Jeff surveyed the damage. All things considered, it wasn't actually that bad. I had doweled each layer for support and used a central skewer to stabilize the whole structure, so the cake looked more like the Leaning Tower of Pisa than a pile of smooshed confectionery crumbs. The biggest problem was the pedestal on which the cake platter rested; two of the four short columns had popped off and refused to snap back on. So I carried the cake into the hall as it was and Jeff helped me prop the poor thing up. Once the cake table was arranged, we situated the cake with the flat side to the back and the sad, wonky pillars out of view.

Photobucket

On the whole, I'm quite relieved. The whole occasion went fine, my homemade ginger ale in the fruit punch was a hit, the table vignette was very pretty, and everyone seemed happy. I lived through my worst fear and came out the other side without too much cake on my face ;-)

Tuesday, January 18, 2011

Dinner Diary

I've been busy the last few days working on my CEUs. I have to complete 10 continuing education hours each year to maintain my therapy license, which is up for renewal at the end of this month. It's a bit of a hassle now that I'm not employed in the field, but I think it's important to maintain my option (and ability) to practice, should I ever want or need it.

Anyhow, that has been taking some time, so no interesting pursuits at the moment. I did, however, prepare (and photograph) one of my first really southern food creations: turnip greens! I've cooked Swiss chard and kale before, but always in creative and ethnic dishes, not just a "mess o' greens". A friend gave me some turnip greens, and since we were snowed in most of last week, I relied upon them to fill in as our vegetable serving and round out the Beef Pizzaiola and garlic toast.

Photobucket
Let me just go on record as saying that any vegetable that has to be boiled down for that long and then sauteed in copious amounts of fat and seasoning to have any flavor, really shouldn't get any credit for being a veggie. Not a stand-alone one, anyhow! The dish was tolerable and added some nice color to the plate, but that is about all I can say for it.

I might pursue a collection of tasty (and healthy) recipes for turnip greens down the road, but for now I'll stick to its more exotic cousins in the form of my favorite Greek and Middle Eastern dishes.

Monday, January 10, 2011

Marshmallow Madness

I've had several requests for my marshmallow recipe, so I'm including it below. At the campout, I was brainstorming with another woman and we thought substituting peppermint or lemon for the vanilla extract might be delicious. We even discussed adding some cocoa powder to the sugar syrup to try to make chocolate marshmallows. I will add the disclaimer that I have not attempted any of these modifications, and candy making can be very finicky business, but it sounds yummy! Let me know if anyone tries this.

Homemade Marshmallows

1 cup powdered sugar, for dusting
2 cups white granulated sugar
1 Tbsp light corn syrup
1 1/4 cups water, divided
1/4 cup unflavored beef gelatin
2 egg whites, room temperature
1 tsp vanilla extract

Lightly spray a 9x9 inch baking dish with vegetable oil spray and generously dust with powdered sugar. Set aside.

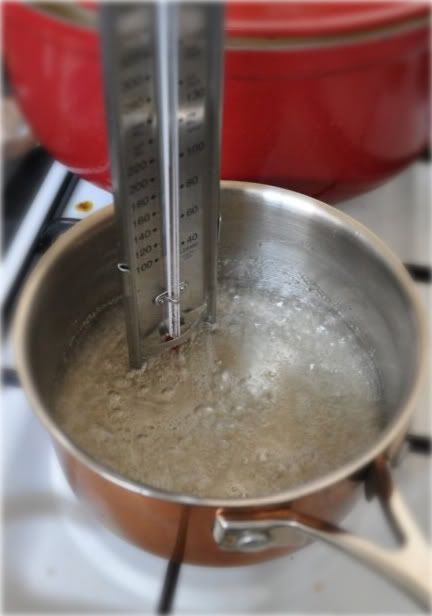
In a medium saucepan (ideally with tall sides) over medium-high heat, stir together white sugar, corn syrup and 3/4 cup water. Heat to 250° - 265° degrees F (121° - 129° degrees C), or until a small amount of syrup dropped into cold water forms a rigid ball.

While syrup is heating, place remaining 1/2 cup of cool water in a small metal mixing bowl and sprinkle gelatin over the surface. Place bowl over double boiler or set in pan of very hot tap water. Stir occasionally until gelatin has dissolved completely. Keep warm until syrup has come to temperature.

Remove syrup from heat and whisk a small amount of the gelatin mixture into hot syrup. Syrup will bubble and froth significantly; stir gently until settled. Continue to add gelatin mixture until fully combined. Set aside to cool slightly.

In bowl of powerful standing mixer, whip egg whites to soft peaks. Slow beater to medium and pour syrup mixture into egg whites in a thin stream. Add vanilla. Once all ingredients are incorporated, beat on high speed until the egg whites are very stiff (10-12 minutes; watch your mixer to prevent overheating or motor damage!). Spread evenly in prepared pan, cover with cling wrap, and let rest 8 hours or overnight.

To cut, loosen edges of marshmallow sheet and turn out onto cutting board. Slice into squares or rectangles with a serrated or bread knife, cleaning blade in between with very hot water. Shake marshmallows in ziplock bag with additional powdered sugar to coat cut edges. Seal bag and store up to 1 month.

Sunday, January 9, 2011

Easy Peasy Personal Pizza

I usually like to use up left-overs and clean out the fridge on Sundays in preparation for my meal planning and grocery shopping early in the week. This sometimes leads to creative uses of the "found" items. Today, I spied about half a cup of homemade barbecue sauce and a little baggie of cooked chicken thigh meat from my broth-making. This, combined with the freebies a family at church gave me yesterday, sparked a fun, almost free, lunch. I made BBQ chicken mini pizzas!

On the whole grain thin buns, I spread the remnant barbecue sauce, distributed the orphan chicken scraps, topped with thinly sliced red onions and lots of fresh cilantro, and sprinkled with cheese. After just a short time in the oven, we savored the tasty treat while enjoying our favorite radio program on NPR, Wait Wait...Don't Tell Me! This was just the thing to warm up after a cold game of tennis in the 19 degree weather and wind.

Photobucket

Tuesday, December 21, 2010

Making Marshallows

In preparation for our winter camp-out weekend in Georgia, I made marshmallows from scratch today. It's been a while since I dug out my candy thermometer, so I'd forgotten all the multitasking involved. While boiling the sugar and water to hard ball stage, I was simultaneously whipping the egg whites to soft peaks and softening the gelatin in a double boiler. It's no wonder I forgot to take pictures until the final product was achieved!

I beat these marshmallows extra long, so hopefully they will hold up on a stick over the fire (that's the downside of the homemade marshmallows; better flavor but inconsistent consistency). I'm stocking up on cinnamon graham crackers and chocolate squares, so it should be a great weekend!

Photobucket

Sunday, November 14, 2010

Super-Easy Husband-Pleaser

Photobucket
I made one of Jeff's favorite recipes the other night, Brandied Candied Sweet Potatoes. It's perfect for a chilly fall night or the upcoming Thanksgiving meal. I served it along side lemon pepper tilapia, herbed couscous, and zucchini Italiano, but it is equally at home with a chicken, beef, or lamb entree.

Brandied Candied Sweet Potatoes

1 lb sweet potatoes
1/4 cup butter
1/4 cup packed brown sugar
1/4 tsp salt
2 Tbsp brandy

Peel and cut the sweet potatoes into 1 inch chunks. In medium saucepan over low heat, melt butter and stir in brown sugar and salt until dissolved. Add the sweet potatoes and stir until well coated. Increase heat to medium, cover and cook 12-14 minutes, stirring occasionally, until almost tender. Remove lid and stir in brandy. Increase heat and stir until liquid has evaporated and sweet potatoes are tender and glazed. Serves 3-4.